The Lexus IS F 8-Speed Sport Direct Shift Transmission Conquering a Stereotype

[Lexus-IS-F-CCS-Concept-224.jpg]

Short Description
Conventional wisdom has long held that a good manual transmission is always faster and more fun than an automatic transmission: Faster because it directly transfers power without the typical power loss of a torque converter, and more fun because it responds exactly to the driver’s commands with no delay. Fast, direct, fully controllable and predictable – exactly the desired qualities in any “driver’s car.” Moreover, precisely the qualities that describe the new Lexus IS F’s 8-Speed Sport Direct Shift transmission.

Website: sandiegolexus.net | Filesize: 233kb
No of Page(s): 5

Content
The transmission is an arrow through the heart of conventional wisdom.
But why go to the trouble of creating an automatic transmission that performs better and faster than a manual? After all, the simple yet effective manual transmission is held in high esteem by driving enthusiasts everywhere.
Engineers love a challenge and when the IS F Chief Engineer dared his staff to build a paradigm-changing high-performance car, the conventional automatic transmission was a ripe target. Why? The IS F would not meet their lofty goals with anything less than a complete re-think of the gearbox. Goals that included scintillating track performance.
Moving from Weakness to Strength
In the process of creating a maximum performance car, Lexus has done nothing less than turn what is typically thought to be a weakness into a solid advantage. To illustrate the point, let’s get right to the qualities that make it so:
• The worlds fastest shift time for street legal production cars. At 0.1 second, it’s faster than you.
• Full manual shift control that can be instantly accessed by moving the console-mounted shift lever to “M” and then using either the steering wheel-mounted paddle shifters or the shift lever. In manual mode, it shifts only when you tell it to.
• A direct feel unrivaled by conventional automatics, made possible via clutch lockup (yes, like a manual) employed in second through eighth gears
• Ultra-quick throttle blipping downshifts match engine and gear speed to avoid sudden engine braking—an advantage during performance driving, on the track or on the road
• First gear torque multiplication for maximum off-the-line acceleration
• Smooth, yet quick and drama free automatic shifting, if that is what you desire
These qualities add up to create a track-worthy ultra-high performance transmission that works for you, not against you, by responding to your demands the moment you want or need it to. And unlike other transmissions built for high performance duty, there is no pain required for your gain.

Get the file Download here

LEXUS RX350 TAKE YOUR HOME COMFORTS WITH YOU

[Lexus-RX-1.jpg]

Short Description
The stunning new Lexus RX350 will spark your imagination and allow you to indulge in all your favourite pastimes. It wraps five occupants in absolute luxury and transports them to the end of the road and beyond. With full-time four wheel drive, impressive 18” alloy wheels and rear limited

Website: www.lexusofwellington.co.nz | Filesize: 940kb
No of Page(s): 2

Content

slip differential, holding the road is never in doubt and the extra ground clearance, combined with four-wheel independent suspension, allows for excursions that would stop other luxury cars.
The advanced 3.5 litre quad cam V6 petrol engine with dual VVT-i is coupled with a 5-speed automatic transmission. With its perfectly matched gear ratios it delivers outstanding performance and fuel efficiency. If you prefer, the transmission can be used in manual shift mode.
A rigid monocoque body structure provides a strong platform for the powerful engine and is
a major contributor to RX350’s excellent stability and control. Advanced vehicle control systems maintain a watchful eye ensuring safe travel at all times.
Outside, the world rushes past in silence thanks to superb sound insulation. Inside, everyone can relax in luxury. The opulent leather seating is the perfect place to relax and enjoy the sublime quality of the audio system. Sound levels and music selection can be adjusted using the steering wheel controls. Driver and front passenger settings for the climate control air conditioning ensure individual comfort needs are met while rear passenger

Get the file Download here

1989 Mazda RX-7 Factory Service Manuals

[Mazda-RX-7-41.jpg]

Short Description
This online/PC copy of the manual is only to be used and in your possession if you already own the printed version. It is for backup purposes only in case yours (or part of) is lost or damaged. If you downloaded this manual by mistake, Please Remove it from your possession. I also take no responsibility for what you do to yourself or your car while you use this manual.

Website: www.teamfc3s.org | Filesize: 5087kb
No of Page(s): 123

Content

Inspection
Passive shoulder belt motor
1. Remove the front and center pillar trim and disconnect the passive shoulder belt motor connector.
2. Connect 12V to terminal a and ground terminal b. Verify that the motor rotates in the forward direction (release).
3. Reverse the above connection, and check that the motor rotates in the rearward direction (lock).

Limit switch
1. Remove the front and center pillar trim and disconnect the passive shoulder belt motor connector, and disconnect the limit switch connector.
2. Check continuity between the limit switch terminals with each condition using the emergency handle.

Get the file Download here

Instruction Manual On Converting Your Lexus SC300 to Supra Twin Turbo Power

https://blogger.googleusercontent.com/img/b/R29vZ2xl/AVvXsEiOmArDIFtjrUno7cqArQ7kWsijVBt8Go-8-bktozCLs3foCNdm1upG2N3rgWnrAuizfMXwqLA4t1ZGU_w7Hz9c8TXbQSYsZyYeqtQc1x_kj2Z_W_zCTLelS4XvtJUFfCzR1rOFYMNz/s400/zenkiv2018ct.jpg

Short Description
It had been almost a full year since I began the project to install a Supra M KIV Twin Turbon engine in my Lexus SC300 coupe. After many delays and heartaches, I have finally completed all the connections to my new engine, and ready for the first test. Anxiously, I slide behind the wheel. Beside me is the empty passenger compartment, still missing the seat removed so long ago. On the passenger floorboard lies the “guts” of the engine brain, or ECU. Literally scores of wires are lying on the pulledup carpet. The entire cneter console has been removed, along with the air conditionng controls and radio.

Website: www.fly-hawaii.com | Filesize: 409kb
No of Page(s): 29

Content


Why a Lexus?
I have been in love with my 1992 Lexus SC300 since the moment I frist laid eyes on it. The car offers everything an auto enthusiast could ever want. Ultimate luxury with all the gadgets, self dimming mirror, memory seats, automatic steering wheel adjustment, the world’s best cruise control (adjust speed easily in increments of one mph!), one of the best factory sound systems ever, beautiful leather interior, sunroof/moonroof, etc. Combine this with killer good looks that continues to age well ten years later, and great handling with variable-assist rack-and-pinion steering.

Get the file Download here

Towing and Road Service Guide For Lexus LS 460

[2010-Lexus-LS460-6.JPG]

Short Description
The Lexus LS 460 has a standard ground clearance of 5.7 inches with the optional air suspension system functioning properly. Loading this vehicle onto a conventional car carrier may require additional ramping in some circumstances. However, clearance at the trailing end of the vehicle should always be monitored as it is loaded. The towing eye bolt should be used for front loading of this LS series vehicle. The eye bolt is located in the tool kit in the center of the rear cargo area under the floor.

Website: partner.aaa.biz | Filesize: 548kb
No of Page(s): 20

Content
If the towing eyebolt is missing or otherwise inaccessible, the tie-down slots on the undercarriage can be used to load the vehicle. Eyebolts are available for purchase through any Lexus dealership parts department. Other towing and tie-down equipment shown in this guide is available through AW Direct, a AAA preferred supplier.
To install the eyelet correctly on this vehicle, start by carefully removing the eyelet receiver cap from the bumper. If a sharp, metal object like a screwdriver is used as shown below, use a cloth or piece of paper to protect the painted surfaces from scratches.
Although the receiver cap cover has a string type piece that holds it to the vehicle when it is removed, it is always a good idea to remove the assembly completely from the bumper. Stow the receiver cap in the vehicle either in the trunk, where the eyelet was stowed, or in a cup holder in the center console, so that it does not blow off the vehicle or get lost during transport.
SHIFTER LOCK OVERRIDE
If there is a problem with the shifter or if the ignition key is not available, the transmission can be shifted out of the park position. This is accomplished by lifting out the small cover above the shifter “Park (P)” indicator and depressing the button below the cover to allow the shifter to be moved out of the Park position.

Get the file Download here

Mazda CX-7 Specification

[2010-Mazda-CX-7-2.jpg]

Short Description
Drive it like a sports car. Pack it like an SUV. You can do both, in the new direct-injected turbocharged Mazda CX-7. All-wheel drive practicality crossed with sports car performance and handling. A commanding seating position crossed with an intimate connection to the road. The Mazda CX-7 blends the best of both worlds into a unique mix that is a joy to drive. And that’s what Zoom-Zoom is all about.

Website: www.mazda.co.nz | Filesize: 1307kb
No of Page(s): 10

Content

Combining both sports car design cues and SUV packaging, Mazda CX-7 creates an immediate impression. The dynamic profile and athletic stance set it apart in the parking lot, just as the performance and handling set it apart on the road. A sharply raked windscreen helps create a sporty outline that is topped off with a sunroof and a flowing side silhouette. The sleek side window design highlights the broad shoulders of Mazda design DNA. It makes you look twice. And closer inspection is rewarded with excellent build quality and attention to detail. Oval-shaped fog-lamps sit either side of the bold lower grille. Alloy wheels shine from within the accentuated wheel arches. Chrome finish handles beckon from the doors. The sporty, aggressively styled rear end is completed by chrome-tipped twin exhausts. In short, Mazda CX-7 has a presence that can’t be ignored. Its enticing design is the perfect introduction to a vehicle that crosses the style you love in a sports car, with the practicality you want in an SUV.

Get the file Download here

1989 Mazda RX-7 Factory Service Manual Steering System

[Mazda-RX-7-20.jpg]

Short Description
This online/PC copy of the manual is only to be used and in your possession if you already own the printed version. It is for backup purposes only in case yours (or part of) is lost or damaged. If you downloaded this manual by mistake, Please Remove it from your possession. I also take no responsibility for what you do to yourself or your car while you use this manual.

Website: www.teamfc3s.org | Filesize: 1251kb
No of Page(s): 28

Content

Engine Speed Sensing Power Steering
Boots
Removal
1. Loosen the wheel lug nuts.
2. Jack up the front of the vehicle and support it with safety stands.
3. Remove the wheel.
4. Remove in the order shown in the figure, referring to Removal Note.

Looseness or play of steering wheel
Move the steering wheel in the direction 1, 2, and 3 to check for column bearing wear, steering shaft joint play, steering wheel looseness, and column looseness.
Stering wheel effort
1. With the vehicle on a hard, level surface, move the steering wheel to put the wheels in the straight-ahead position.
2. start the engine and warm the power steering fluid to 50-60C (122-140F).
3. Attached a pull scale to the outer of the steering wheel, and then, starting with the wheels in the straight-ahead position, check the steering effort required to trun the steering wheel to the left and to the right.

Get the file Download here

1989 Mazda RX-7 Service Manual Manual Transmission

[Mazda-RX-7-27.jpg]

Short Description
This online/PC copy of the manual is only to be used and in your possession if you already own the printed version. It is for backup purposes only in case yours (or part of) is lost or damaged. If you downloaded this manual by mistake, Please Remove it from your possession. I also take no responsibility for what you do to yourself or your car while you use this manual.

Website: www.cochran-racing.com | Filesize: 2195kb
No of Page(s): 47

Content

Countershaft front bearing spacer
Note: Replace the countershaft front bearing and countershaft front bearing spacer as one assembly.
1. Install the friction gear, diaphragm spring, and countershaft front bearing spacer.
2. Press the countershaft front bearing spacer onto the countershaft with the SST.
Measurement of Bearing Thrust Play Mainshaft front bearing
1. Measure the depth of the mainshaft front bearing bore in the rear of the transmission case.
2. Measure the mainshaft front bearing height. The difference between the two measurements indicates the required thickness of the adjustment shim.

Get the file Download here

2000 Mazda MX-5 Workshop repair Manual

[Mazda-MX-5-Black-and-Matte-7.jpg]

Short Description
For proper repair and maintenance a thorough familiarisation with this manual is important and it should always be kept in a handy place for quick and easy reference. All the contents of this manual, including drawing and specifications, are the latest available at the time of printing. As modifications affecting repair or maintenance occur, relevant information supplementary to this volume will be made available at Authorised Mazda dealers. This manual should be kept up-to-date.

Website: halstenstad.net | Filesize: 3781kb
No of Page(s): 78

Content

Lubrication System
Engine Mount Nut Removal Note
1. Loose the oil pan mounting bolts.
2. Remove the engine mounting nuts.
3. Lift the engine slightly by using a hoist.
Crossmember Bolt and Nut Removal Note
1. Support the crossmember by using a transmission jack.
2. Remove the crossmember bolts and nuts.
3. Lower the crossmember until the clearance between the oil pan and the steering gear housing exceeds.
Oil Pan Removal Note
1. Remove the oil pan mounting bolts.
Caution
Pry tools can easily scratch the cylinder block and the oil pan contact surfaces. Prying off the oil pan can also easily bend the oil pan flange. Refer to the following instructions before removing the oil pan.
2. Insert the screwdriver only at the points shown in the figure.

Get the file Download here

1989 Mazda RX-7 Factory Service Manual Engine

[Mazda-RX-7-37.jpg]

Short Description
This online/PC copy of the manual is only to be used and in your possession if you already own the printed version. It is for backup purposes only in case yours (or part of) is lost or damaged. If you downloaded this manual by mistake, Please Remove it from your possession. I also take no responsibility for what you do to yourself or your car while you use this manual.

Website: amjlsr.com | Filesize: 4498kb
No of Page(s): 88

Content

Drive plate (A/T)
1. Fit the key to the eccentric shaft.
2. Install the counter weight to the eccentric shaft.
3. Apply thread locking compound to the eccentric shaft threads.
4. Apply sealant to the contact surface of the locknut.
5. Install the ocknut and tighten it with the SST.
6. Install the drive plate so that the holes in the drive plate and counter weight are positioned as shown in the figure. Install the back plate and tighten.

Get the file Download here

1989 Mazda RX-7 Factory Service Manual

[Mazda-RX-7-34.jpg]

Short Description
This online/PC copy of the manual is only to be used and in your possession if you already own the printed version. It is for backup purposes only in case yours (or part of) is lost or damaged. If you downloaded this manual by mistake, Please Remove it from your possession. I also take no responsibility for what you do to yourself or your car while you use this manual.

Website: www.cochran-racing.com | Filesize: 4794kb
No of Page(s): 86

Content
Troubleshooting of Each System
The troubleshooting guide lists the most likely causes to a given symptom. After finding the systems to check, refer to the pages shown for detailed guides. The numbers of the list show the priorities of inspections from the most probable to that with the lowest probability. These were determined on the following basis:
- Ease of inspection
- Most possible system
- Most possible point in system

Engine Tune-Up
Basic Inspection
Tune the engine according to the procedures described below
Battery
1. Check for corrosion on the terminals and for loose cable connections. If necessary, clean the clamps and tighten firmly.
2. Check the electrolyte level. If the level is too low, add distilled water to the “UPPER LEVEL” mark.
3. Check the specific gravity with a hydrometer. If the specific gravity reading is 1.23 or less, recharge the battery.

Get the file Download here

CCL-EAR Committee Review of Auto Repair Reference Center

https://blogger.googleusercontent.com/img/b/R29vZ2xl/AVvXsEis4woOFQciobiIz4bFjGktpmGTSGpJ3QkRteXvETAsIP9KlpkSnnU2lsc0fQoRa2KADLckUOqI-D3pcnG0YBUApLV7AY3JNBeM030FB5KChYjgRc9DNfW51Lxg7FCsgglnQAKJ4AaeqbG5/s400/2010+MazdaSpeed3-12.jpg

Short Description
choosing the date (1998), then make (Mazda), model (Protégé), and finally type (LX). Once the. specific vehicle is chosen the repair manual is displayed as …

Website: www.cclibraries.org | Filesize: 124kb
No of Page(s): 5

Content
Selected Members of the CCL-EAR Committee Review
Of Auto Repair Reference Center
September, 2003
In September 2003, selected members of the California Community College Libraries, Electronic Access to Information Resources Committee (CCL-EAR) undertook a “hands-on” study of EBSCO Publishing’s Auto Repair Reference Center.
EBSCO Publishing has partnered with Point 5 Technologies to create Auto Repair Reference Center(tm). The information in this database contains complete automotive repair information supplied by Nichols Publishing, publisher of Chilton information. Auto Repair Reference Center contains information on most major manufacturers of domestic and imported vehicles, with repair information for most vintage makes starting as far back as 1954. Database content includes approximately 23,000 vehicles covered from 1954 to present; over 100,000 factory drawings and step-by-step photographs; over 60,000 technical service bulletins & recalls issued by the original equipment vehicle manufacturer; wiring diagrams for easy viewing and printing; specifications & maintenance schedules; Labor Time Guide & Estimator; Quick Tips, a complete guide to vehicle ownership & maintenance; unlimited remote access and much more. New repair procedures and updates will also be added continuously.
Selected members of the CCL-EAR Committee, independently or in concert with other qualified professionals…

Get the file Download here

How To Install The OEM Fuel Line Upgrade Kit In 93+ Mazda RX-7s

http://3.bp.blogspot.com/_yzb91PHHy60/S9G7liYtdiI/AAAAAAAAPzo/fe4c5c3rpgc/s1600/RE-Xtreme_TargaTas_10p6tsw.jpg

Short Description
This document is intended to help guide you with the installation of the Mazda “Fuel Line Upgrade Kit” (part number N3A1-13-S70A - $63.25) and is in no way intended to be a complete instructional “how-to”. You should have confidence in your mechanical abilities before attempting the following procedure. If you are unsure if you can finish the installation, consult with your local Mazda dealer or mechanic. If you are not comfortable doing this maintenance by yourself, ask a friend to help and work as a team. A pizza and some drinks can go a long way.a

Website: westpennmazdaclub.com | Filesize: 310kb
No of Page(s): 6

Content
Read through this entire document in advance and have the factory service manual (FSM) available for any specific maintenance practices, procedures, and torque specifications. Having plenty of time to perform the procedure is recommended, as is a clean work environment.
Before disconnecting any fuel line, depressurize the fuel system using the procedure outlined in the FSM to minimize fuel loss. Do the same for the cooling system by removing the filler cap. Since you will be disconnecting coolant lines, make sure you have some premixed coolant available to replenish the system when the job is complete. Make sure you have something available to plug these lines to minimize the loss of fluids. If you spill any fuel and coolant on the engine, clean it up before starting reassembly (use standard precautions and procedures for removing spilled fuel and coolant from painted surfaces).
Next, seal all air, fuel, and coolant orifices with clean rags, tape, plugs, or plastic upon disassembly to prevent foreign objects entering and causing accidental internal damage. Make sure all such barriers are removed and accounted for during reassembly. This may seem like common sense, but it’s very important. A turbo won’t spin well with a shop rag wrapped around it. Also, since you will have access to the “rats nest” of vacuum lines, consider the opportunity to replace them if not done already. Make sure you have the necessary materials available to minimize downtime.
This is also a good opportunity to send the fuel injectors out for cleaning and blueprinting, especially if you suspect they are suffering poor performance. Additionally, if you’ve been contemplating upgrading to higher flow injectors, you may want to have the parts on hand prior to performing the following procedure. An instruction document on how to install stock 850cc secondary injectors in lieu of the 550cc primaries is available from the author (see “How To Replace Stock 550cc Primary Injectors With OEM 850cc Injectors In The 93+ RX-7”).
Finally, label parts and electrical connectors as you take them apart to take the guesswork out of reassembly. This saves time by creating efficiency. All things considered, the kit goes together easily as most of the parts are self-explanatory. The pictures throughout this document were provided by Martin Crane, except Figure-1, which was provided by Jeff Hoskinson. They are intended to help clarify any questions you may have during the installation.

Get the file Download here

Mazda 2 Specification

https://blogger.googleusercontent.com/img/b/R29vZ2xl/AVvXsEhq1Jin2KBxV-I9_hZZOSrTScYlLjkH7Rn2EuQ14fohwpIhXIB90PIiBilj7q6emILFbfnVPIys1CSq_RaKz2hzribP8saoqYUmsfsNv000W8yMj4nvCL9rzDNVV69nl1plxczo99uv3eE/s400/carazine.blogspot.com02+Dec.+27+18.54.gif

Short Description
Motorway ramps. City streets. Country roads. Wherever you are in a Mazda2, it’s all about fun. The fun that comes from a car that’s responsive and nimble. A car with a healthy dose of sporty attitude. Standard or Sport, whichever model you choose, the fresh style, insightful engineering and spirited performance of Mazda2 is bound to put a smile on your face. And some Zoom-Zoom in your life.

Website: www.sigatokariver.com | Filesize: 553kb
No of Page(s): 8

Content
Where to? Wherever you like! In a Mazda2 Standard or Sport, getting there is so easy and so much fun. Behind the wheel, you’ll quickly feel at home, with all the controls at your fingertips. Look ahead and take in the panoramic visibility. Fasten the seatbelt, start the engine and Zoom-Zoom begins. The Mazda2 handles so well. In the cut and thrust of city driving, it goes exactly where you point it. On the highway, it’s rock solid and ultra comfortable. Electric power assistance makes the steering extra responsive, with great road feel at all speeds. The zippy 1.5 litre S-VT engine is now even more refined so overtaking is a breeze and cruising is effortless. Yet with all this zip under the bonnet, Mazda2 now sips even less fuel. Just as it takes very little to make a Mazda2 go, it takes very little to make it stop. Gentle pressure on the brake pedal provides maximum control in all conditions. ABS with Electronic Brake-force Distribution is standard on both models. You’ve also got a choice of transmissions, both of them fun and easy to use. There’s the smooth shifting 5-speed manual. Or the new, sporty 4-speed Activematic. Leave it in auto mode, or change up or down through the gears without a clutch. So what else can we say about a car that’s terrific to drive, easy to park and is light on fuel? Actually quite a bit. Keep reading and you’ll see why Mazda2 is just too good.

Get the file Download here

Mazda Miata, MX-5, Eunos & Roadster

[Mazda-MX-5-Superlight-1.jpg]

Short Description
These cars use a conventional cooling system in which the water-based coolant is circulated around the engine by a small centrifugal pump driven by a belt from the crankshaft. Engine heat is transferred to the coolant, which is constantly circulated through the radiator. Air passing though the radiator matrix reduces coolant temperature before it circulates once again through the engine. Hot air is sucked from the engine compartment by the airstream created by the moving car. An electric cooling fan switches on at a predetermined coolant temperature to draw air through the radiator matrix. This ensures adequate cooling in very hot temperatures, or when in slow-moving traffic.

Website: www.veloce.co.uk | Filesize: 319kb
No of Page(s): 5

Content

During cold weather, the interior of the car is heated by a system like the engine cooling system running in reverse: hot coolant from the engine is diverted through the heater matrix below the dashboard, and air is passed through the matrix to extract heat to warm the passenger compartment. The heater control allows the occupants to control a combination of recirculated and fresh air, and to boost the incoming airflow with an electric fan. An optional air conditioning system is available. This works pretty much like a domestic refrigerator. An engine-driven compressor circulates refrigerant through the condenser - effectively another radiator - mounted in the nose of the car. The condenser, backed up by an electric fan, is designed to dump unwanted heat into the passing airstream. Refrigerant is piped to the cooling unit (evaporator) mounted under the dashboard. Hot air from the car’s interior is passed through the evaporator, the refigerant absorbing the air’s heat and thus reducing its temperature. The warmed refrigerant evaporates into a gas which is pumped back to the condenser, where it cools and liquefies: the cycle is then repeated.

Get the file Download here

NEW MODEL RELEASE Mazda MX-5

https://blogger.googleusercontent.com/img/b/R29vZ2xl/AVvXsEgXZvFYMo_69iazQRO68vQ4WQQyA1Xp886yIT-ax9xomiEHmWIZVfqSY9t0rrpWVcTYV7_-POyQ94Yekn-vWnB8WXuZJ5X3vjRj_nT_dxU0FHt0ZOT3jGsUTM7CHEbnm4LTkvRGCGP7BQ9e/s400/2009+Mazda+MX-5+2.0+Roadster+Coupe.jpg

Short Description
In 1989 Mazda introduced the Mazda MX5 to the motoring public, putting a fresh perspective to the original concept of a fun, exiting to drive, affordable two seater sports car. Sixteen years on the third generation MX5 is poised to continue the success of the original . The new model isn’t a radical departure from the original, Mazda has continued the evolutionary design that has worked so well, and the new model remains true to the original concept. The most noticeable styling elements of the original , flowing curves and proportions looking through the sides have been retained, with a smoothing of the classic “Coke Bottle”shape apparent when compared to the outgoing model. Whilst its looks have evolved, the latest model is new from the ground up, and Mazda executives claim the only carry over component is the side repeater lamp.

Website: www.aaa.asn.au | Filesize: 99kb
No of Page(s): 3

Content
Three full size clay models were developed by Mazda’s design studios in the US, Germany, and Japan before the designers settled on new shape. [the Japan design studio won out] The all new MX5 is bigger in all aspects, it has a new 2.0 litre engine with 118kW of power replacing the previous 1.8 litre engine, a new six speed automatic transmission with wheel mounted paddle shifts, larger cabin dimensions, extra safety features that now includes side airbags and anti whiplash seats. The new generation MX5 hasn’t gained any weight either to accommodate these extra features, the new body shell is nearly 50% torsionally stiffer but overall the new generation MX5 is only four kilograms heavier in base form then the superseded model. One element that hasn’t increased is the MX5’s fuel consumption , the new model even with its performance increase returns 8.5 L/100km with a manual transmission and 8.8L/100km for the new six speeds automatic. Both figures are better than the outgoing model. The good news for buyers is that with all the additional mechanical upgrades the base model MX5 pricing starts at $41,860, just under $1000 more than the superseded model.

Get the file Download here

2004 Mazda RX-8 Quick Tips PDF

https://blogger.googleusercontent.com/img/b/R29vZ2xl/AVvXsEh6XQLQyD-nPqQofILSA-dc8KEvth5uOaG9Qa1aONO8z7m3UmdhUmJ97u2Bpd5N4KQrC5m7W6KO1asWDKrYoH6JYFu1wYOQXCL5c3e5zW9a1FgB6Yh3H4gPjETi2hdZs6jRgkj3YxIm_z9n/s400/Mazda-RX8-2.jpg

Short Description
Getting Started RX-8 Quick Tips® are designed to quickly familiarize you with some important features of your RX-8 This Driver’s View tab is your index to the Quick Tips®, locate the item you would like to learn more about and then turn to the listed tab Be sure to see the tab called Getting Started, this section contains important operating tips about your RX-8 Items identified with a Rotary Engine symbol call out important information

Website: www.calcar.net | Filesize: 1001kb
No of Page(s): 12

Content

Short trip driving procedure Any trip that is too short for the engine to reach normal operating temperature; needle in middle of temperature gauge indicates normal temperature The following procedure should be followed when moving vehicle a short distance**:
1. Start engine
2. Move vehicle
3. Warm engine for 5-minutes at idle
4. Raise engine speed to 3000 RPM for 10-seconds
5. Return to idle
6. Turn off engine
Tip: Warming up engine improves engine life

Tips: Close rear door first, then front door; damage may occur otherwise To prevent alarm arming with passenger inside vehicle, driver must manually lock door by pressing lock knob RX-8 rotary engine precautions Check engine oil level when refueling Rotary engine design uses an oil injection system in addition to lubrication of internal parts It is important to maintain proper oil level Engine oil level warning light Indicates low engine oil if illuminated; pull over to a safe location; turn engine off and check engine oil level when engine is cool, add engine oil if necessary

Get the file Download here

Mercedes 190D-2.2 (W201) Rear Axle Carrier Mount (Rear Subframe Mount) Replacement Instructions

http://3.bp.blogspot.com/_lsyt_wQ2awY/SJpxlvGc-cI/AAAAAAAACA8/wIZBPRrLV7c/s400/Mercedes-Benz-C200_CGI_Estate_Elegance_2004_800x600_wallpaper_03.jpg

Short Description
I’m curious to know how many people make use these instructions, so if you try them out, then please e-mail me at matt.cervigmailcom and let me know! If people find them to be helpful, I might make more instructions the next time I fix the car. These instructions show you how to replace your rear axle carrier mount bushings (also known as rear subframe mounts). These are parts 1a, 1e and 1f in the image below. They are located just in front of the rear wheels.

Website: www.dot7design.com | Filesize: 3239kb
No of Page(s): 5

Content

How do you know if they need replacing?
Jack up the car, and take a look at them. In the images below, you can see that the one on the left is somewhat worn out (note the cracks) but still intact. The one on the right is obviously torn, so it must be replaced. Things you need
- 3 jacks (I used a floor jack, a bottle jack and a scissor jack) and bricks / wood blocks
- Jack stands
- 19mm socket and extension
- Long-handled torque wrench capable of ~60 ft-lbs
- Some sort of silicone-based lubricant (not petroleum-based!)
- Wooden tidbits & sliding miter saw (or table saw, or chisel, or…)
- Scrap metal (I used 1/16” aluminum) and a means of cutting it (can be crude).
- Subframe mount repair kit. This kit contains enough parts to do the subframe mounts on the front of the rear axle, on both sides of the car – Mercedes part 124-350-03-41. Included are 2 bushings, 2 washers and 2 bolts. Note that the bushings included in this kit are part 124-351- 19-42 while the ones installed on the car were 201-351-27-42. That’s OK – the new ones fit fine.
- Patience. Removing the old parts probably won’t go as planned.
- A cute, nice wife to bring you parts and crackers while you are under the car.

Get the file Download here

Mazda CX-7 Brief Specification

https://blogger.googleusercontent.com/img/b/R29vZ2xl/AVvXsEjIRfhcHvEsEPUYaGhwfBzEsM7yRrZoEp5GjZWvB2m95aq7bI-_WZkESUo_oGKRNyTxzHyRkGHfcDt3WehNRMhPMBBMdziilyflNDeAqWeVnfh0lVFkrL-mcfpZlqVkA0uWta1GgY6FqvJy/s1600/2009-Mazda-CX-7-10.jpg

Short Description
It’s rare, but from time to time you discover something…different. Where convention has been broken, the rules have been twisted and ‘New’ has been created. For example, take a powerful and dynamic sports car as a starting point; add size, presence and intelligent 4-wheel drive. The result? The all-new Mazda CX-7. Innovation defined.

Website: www.mazdacarsales.com | Filesize: 1033kb
No of Page(s): 13

Content
Purposeful and perfectly balanced. Mazda CX-7 will take you to places not yet travelled. From the commanding seating position, behind the steeply raked windscreen and leather-wrapped steering wheel, your world becomes a whole new experience.
How can it be that a car with this level of luxury, comfort and presence should perform with this much sports car engagement? Available with one high specification, your choice is made even simpler. The lightweight all-aluminium 2.3-litre direct injection, turbocharged engine delivers a deeply-satisfying 258ps and 380Nm of torque. Numbers that will sweep you from 0 - 62mph in just 8.0 seconds. Does it matter? Oh yes!

Get the file Download here

Mazda Service Bulletin ROUGH IDLE, LACK OF POWER, AND/OR MIL ON WITH DTC P2177/P2187 (FUEL SYSTEM LEAN)

http://2.bp.blogspot.com/_2UbsSBz9ckE/Svw1NIMT5OI/AAAAAAAAAc0/Qn97hAtwNgY/s1600/Mazda_Furai_concept_hd_wallpaper.jpg

Short Description
Due to low fuel pressure at the high-pressure fuel pump, some vehicles may experience the following:
• Rough idle, stall, and/or hesitation under cold conditions.
• Intermittent lack of power during acceleration when the engine gets hot.
• MIL turns on with DTC P2177/P2187 (fuel system too lean at off idle).
This is caused by a delayed fuel pressure build-up from the high pressure fuel pump. There are two main reasons for this:
1. The drive current from the PCM is not enough for some fuel pumps.
2. Some fuel pumps have slower response.
To fix the problem, the PCM software and the specification of the high-pressure fuel pump have been changed. Customers having this concern should have their vehicle repaired using the following repair procedure.

Website: www.accessecu.com | Filesize: 101kb
No of Page(s): 6

Content

REPAIR PROCEDURE
1. Reboot the IDS to clear memory before reprogramming.
2. Using IDS 51.9 or later software, reprogram the PCM to the latest calibration (refer to “Calibration Information” table) by following the “Module Reprogramming” procedure.
NOTE:
• Always update the IDS tool first, then follow on-screen instructions to download the needed calibration file for PCM reprogramming.
• It is not necessary to remove any fuses or relays during PCM reprogramming when the IDS screen prompts you to do so. You may accidentally stop power to one of the PCM terminals and cause the PCM to be blanked, or you may receive error messages during the IDS reprogramming procedure.

Get the file Download here

2001 MERCEDES C240 ELEGANCE

http://3.bp.blogspot.com/_lsyt_wQ2awY/SJwE9KtIKqI/AAAAAAAAC_o/fYbd3NiBLFM/s400/Mercedes-Benz-C-Class_DTM_AMG_2007_800x600_wallpaper_04.jpg

Short Description
The lines of the new Mercedes C-Class are similar to those of the prestigious S-Class representing an excellent Cx of 0.27. Wheelbase, length and width have gained a few centimetres. The C-Class is a rear-wheel-drive vehicle that comes with a choice of a new 2.6- litre V-6 or a 3.2-litre V-6 already available in other models. The new V-6 can be mated to a sixspeed manual gearbox or a five-speed automatic.

Website: www.caaquebec.com | Filesize: 14kb
No of Page(s): 4

Content
Interior and trunk
Despite the low stance, access proves relatively easy. The front seats are extremely comfortable, with two shock absorbers under the rear of the cushion which, combined with the suspension, work so well that you almost want to chase bumps just to enjoy how well they’re absorbed. The sunroof makes headroom tight for tall individuals. The lever to adjust the fore-aft movement of the seat is a long reach near the centre console. Mercedes should relocate the lever on the door side to make it easier to move the seat back before getting in. The rear bench provides very good seating for two, but foot room is a bit tight. A 60/40 split backrest and a ski bag are available as options. The rear package shelf holds a complete first-aid kit. The trunk is spacious.
Convenience and safety features
Needless to say, fit and finish are impeccable and sound insulation is very efficient. Materials and controls have a feel of quality that was missing in recent years in other Mercedes offerings. The dual-zone air conditioner with independent controls for the driver and front passenger works impeccably. A “REST” position circulates cool or warm air, depending on the season, for 30 minutes after the engine is switched off, if the battery charge is sufficient. Once you get used to this feature, you won’t want to do without it. Mercedes has re-instated a dual wiper system but will have to improve the control. You have to apply the right pressure to use the MIST function. Too much pressure turns the washers on. We humbly suggest a traditional lever on the right that you simply raise or lower when needed. The present system also turns on the wipers before the washers have a chance to wet the windshield, something even the manufacturers advise against. The washer fluid tank holds only three litres whereas it should hold at least four. There is plenty of room for a bigger tank, since models with headlamp washers have a tank that holds more than six litres.

Get the file Download here

Sprint Booster A technical white paper

https://blogger.googleusercontent.com/img/b/R29vZ2xl/AVvXsEiKIMOfitE9DuW-DAhgFVSyJ6RIikVn3PhLYpTvsvXdXo1Qq_j6Fg4gzt9emz7mqJVHVMj1tj6tKCsOnKhPd4VPSsDBVoVYEtVqNB8v8YrDpb_Fv9WTIMjzHs91CEWp_uePyr4XBM7m-DZb/s400/5.Mercedes+Benz+F400+@+www.g8tcarsnbikes.blogspot.com.jpg

Short Description
Several Mercedes owners had installed a Sprint Booster in their cars and subsequently posted rave reviews about it. I wondered if all of their claims were true. Frankly, I was skeptical, but if these owners were on to something, I might want a Sprint Booster in my car! I also wanted to know how the Sprint Booster worked. I decided to investigate. The results of my investigation are presented here.

Website: frontiernet.net | Filesize: 576kb
No of Page(s): 13

Content

The Sprint Booster is an aftermarket electronic module that plugs in between the accelerator pedal and the engine control unit (ECU) in vehicles equipped with an electronic throttle control. Many Mercedes, BMWs, Audis, and other vehicles sold today employ electronic throttle control, and more vehicles are going that way. The Sprint Booster web site makes these claims regarding electronic throttle control and the Sprint Booster:
“The ECT system (Electronic Throttle Control) – also known as drive-bywire – has the unfortunate downside of delayed throttle response and subdued acceleration, creating problems in certain circumstances such as up-hill starts, quick gearchanges, overtaking, etc.”
“The Sprint Booster aims to overcome this throttle response delay for ECT-equipped vehicles, providing crisp on-tap acceleration at the driver’s disposal.”
“By installing the SPRINT BOOSTER, we eliminate the delay that occurs from the moment that the throttle is depressed and the electronic throttle control opens the butterfly, thus greatly improving the car’s acceleration figures.”

Get the file Download here

MERCEDES-BENZ C-class C240 and C320 Automatic Sedans

http://1.bp.blogspot.com/_lsyt_wQ2awY/SJmr4Uvg2UI/AAAAAAAABlU/3wdWF1DEjxg/s400/Mercedes-Benz-C-Class_2001_800x600_wallpaper_01.jpg

Short Description
The new Mercedes-Benz C-class range not only looks a whole lot better, it introduces a host of new features and technical innovations. Mercedes-Benz says that the changes are aimed particularly at improving safety, comfort and driving pleasure, and also to provide the cars with a more dynamic appeal that will complement their fresher and more youthful appearance.

Website: www.aaa.asn.au | Filesize: 176kb
No of Page(s): 2

Content

As in the E-class and S-class sedans, the new C-class has more front legroom than anyone is ever likely to need. This is just as well, because rear legroom is very tight with the front seats set right back. With the front seats set in a position to suit my reasonably long legs, rear legroom was just enough for adults. Seat comfort is generally good for four out of the five occupants; the centre rear position is uncomfortable, due to limited seat padding and a large floor hump. Good suspension compliance provided both test cars with a comfortable ride that did not seem unduly affected by the low profile 55- series tyres that are fitted. There’s no facility to fold the rear seat (though a split-fold rear seat is listed as an option) but the standard boot is of a good size and it should prove adequate in coping with the requirements of an average family.

Get the file Download here

ALL NISSAN BRAKE NOISE/JUDDER/PEDAL FEEL DIAGNOSIS AND REPAIR MANUALS

https://blogger.googleusercontent.com/img/b/R29vZ2xl/AVvXsEhu0RCjxYz08LjZyG00tqM4qkVV35v1zfZf0ZPsOmm9JPkHIl_K28I2DHyzfMn6K0Tsm6QRBWOhXF8hktYL3hd-X_hiNgzCY1sOLBjJXeGgQ1nMDeRypdBapwtlreGXKvAUWevOOD12SXC4/s400/nissan-370z-brakes.jpg

Short Description
• This bulletin is to assist you in responding to customer questions about brake operation, and provides diagnostic and repair information for each item listed, if any should occur.
• Most brake incidents fall into the following categories:
a. Brake Noise: A squeak, squeal, clunk, or groan that occurs when the brakes are applied or released.
b. Brake Judder: A vibration that can be felt in the vehicle, steering wheel or brake pedal when the brakes are applied.
c. Pedal Feel: The effort needed to operate the brakes is too high or too low.

Website: www.lyberty.com | Filesize: 135kb
No of Page(s): 7

Content
SERVICE PROCEDURE
1. Verify the condition by road testing the vehicle with the customer.
2. Determine the specific brake incident based on the description in the Service Information above.
3. Follow the appropriate repair procedure(s), listed on the following pages, for your specific incident.
BRAKE NOISE
• Brakes can make a range of noises when applied or released. Some noises are normal and no repair action should be taken.
• Use the following descriptions to identify the specific type of brake noise and the appropriate repair:
Squeak noise when the brakes are cold:
• Usually occurs during the first few stops in the morning.
• This is a normal condition. No service action is necessary

Get the file Download here

1996 1999 Nissan Pathfinder (R50) Automatic to Manual Transmission Conversion Manual

https://blogger.googleusercontent.com/img/b/R29vZ2xl/AVvXsEiYDWlzczvsMRKw4KYtDmUZxiiy4J80CFeqIiy2gHHABSnoyXilWwsk0R3vrQFii-r1dcOLfRkrI5763lxJXiO08g_gcZr5PJ2zkOt-1O5jnHGr95exbj4Xm3K2dnbRQUGCE_fl48tLFi5I/s400/2005+Nissan+Pathfinder.jpg

Short Description
This manual will, in detail, give the information you will need to convert a 4×4 1996-1999 Nissan Pathfinder from an automatic transmission to a manual transmission. Having a manual transmission in your Pathfinder gives you more control, lower gears, and more power than you would have with an automatic. Other benefits include better gas mileage, lower maintenance cost and reduced electronic dependence. Although the part prices and part numbers are directly from the dealership many auto recyclers will have serviceable parts at a much lower price. It is highly recommended that you contact auto recyclers in your area for the manual transmission and transfer case assembly, or transmission only in the case of 2wd vehicles.

Website: overlandtrucks.com | Filesize: 824kb
No of Page(s): 24

Content

Before starting this procedure drain the automatic transmission fluid and transfer case fluid (4wd models). It’s important to dispose of all fluids at an authorized recycling center.
1. Remove the negative battery cable.
2. Remove the crankshaft position sensor. It is located on the top driver’s side of the bell housing.
3. Remove exhaust tubes from the catalytic converters all the way back.
4. Unbolt and remove the fluid change pipe from the engine and transmission. In order for the fluid change pipe to clear the engine completely remove the automatic transmission.
5. Remove the oil cooler lines from the transmission and plug all open transmission holes.
6. Remove transfer control linkage on the driver side rear of the transmission. (4wd models only)
7. Remove front (4wd only) and rear driveshaft.
8. Remove the transmission control cable.
9. Remove the passenger side exhaust heat shields.
10. Disconnect the wiring harnesses from the transmission located at the rear passenger side.
11. Remove the starter wires and then the starter.
12. Remove both engine gussets
13. Remove the lower splash shield.
14. Remove the bolts securing the torque converter to drive plate.

Get the file Download here

2007 Nissan Service and Maintenance Guide

https://blogger.googleusercontent.com/img/b/R29vZ2xl/AVvXsEiwb7zDqVrQ9T9K62OR2E1g2LeirygNBFhG-wNLB4R_s8RPEFAG_Awl8-a09KmlyDaXHkOdzH26UNbVQqd60SPL_xCl1wX8bP44WpoErJD14w_RBmav4EPc8pf7XPjt7E4NFzercJzNW12p/s400/2007+Nissan+Qashqai.jpg

Short Description
Preventative scheduled maintenance is an important investment to optimize the performance, reliability, safety and resale value of your Nissan. Scheduling your vehicle’s maintenance at the recommended intervals will ensure your vehicle is running at its best. We want you to enjoy your Nissan vehicle. This Service and Maintenance Guide is designed to help you make sure your vehicle receives proper and timely maintenance that is necessary. Key services are explained in detail, along with an outline of scheduled maintenance to help you maintain your vehicle. Your local Nissan dealer can assist you in determining the best schedule based on your driving habits and local conditions.

Website: www.nissanextendedwarranty.com | Filesize: 862kb
No of Page(s): 60

Content

The following descriptions are provided to give you a better understanding of the scheduled maintenance items that should be regularly checked or replaced. The maintenance log indicates at which mileage/time intervals each item requires service. In addition to scheduled maintenance, your Nissan requires that some items be checked during normal day-to-day operation. You can find these items listed under “General Maintenance” in Chapter 8 of your Owner’s Manual.

The following Maintenance Log has been compiled by Nissan to assist you in performing the recommended maintenance services and keeping appropriate records of services performed. Along with the related repair invoices, receipts, and other such records, a properly documented maintenance history could enhance the value of your vehicle should you ever wish to sell it. The services listed represent the minimal Nissan recommended requirements for each time/mileage interval, up to 120,000 miles / 96 months.

Get the file Download here

2006 Nissan Murano Owner Guide

https://blogger.googleusercontent.com/img/b/R29vZ2xl/AVvXsEg_pnF4flGlyibXWjRuEvns9-8DW9r63RRFZZiU-Fa8hwfMys1jG_wCt8HSQNVwyBCFaN-FnZhmuTiPf04wN8m_UXqBUX0MzvefJqmE4Ugf0YGpfQFf-v-fwRlGcXXuNd7YjFVRG2LaNB4/s400/2007_nissan_murano_a.jpg

Short Description
Welcome to the growing family of new NISSAN owners. This vehicle is delivered to you with confidence. It was produced using the latest techniques and strict quality control. This manual was prepared to help you understand the operation and maintenance of your vehicle so that you may enjoy many miles of driving pleasure. Please read through this manual before operating your vehicle.

Website: www.club-nissan.ru | Filesize: 3702kb
No of Page(s): 341

Content

Forward and backward Pull the lever up (1) while you slide the seat forward or backward to the desired position. Release the lever to lock the seat in position. Reclining To recline the seatback, pull the lever up (2) and lean back. To bring the seatback forward again, pull the lever and move your body forward. The seatback moves forward. The reclining feature allows adjustment of the seatback for occupants of different sizes for added comfort and to help obtain proper seat belt fit. (See “Precautions on seat belt usage” later in this section.) The seatback may also be reclined to allow occupants to rest when the vehicle is parked.

The light and chime remind you to fasten seat belts. The light illuminates whenever the ignition switch key is turned to ON, and will remain illuminated until the driver’s seat belt is fastened. At the same time, the chime will sound for about 6 seconds unless the driver’s seat belt is securely fastened. The seat belt warning light for the front passenger will illuminate if the seat belt is not fastened when the front passenger’s seat is occupied (if so equipped). For 5 seconds after the ignition switch is in the ON position, the system does not activate the warning light for the front passenger. See “Seat belts” in the “1. Safety — seats, seat belts and supplemental restraint system” section for precautions on seat belt usage.

Get the file Download here

NISSAN 4 SPEED AUTOMATIC TRANSMISSION HARSH 1-2 SHIFT AND/OR DTC P0745 STORED

https://blogger.googleusercontent.com/img/b/R29vZ2xl/AVvXsEi3DEZD84OJ2XZI7ylACV_8szbY3AmzzUqOxgg90yleoKLfMSDy9BsEEEBjUtr4O_cyGVI6qqz8OoxPmoiWm0CN_9Uk88NguOGfpPiIPFU73xraBJtkPjGrhruFrnYSvMYLjg_RAi2bAt8/s1600/nissan-300zx-z31.jpg

Short Description
The transmission fluid is full (correct level) and in good condition (not burnt), and
• There is a harsh shift from 1st to 2nd gear, and/or
• DTC P0745 (line pressure solenoid circuit) is stored,

Website: nissan.justanswer.com | Filesize: 229kb
No of Page(s): 8

Content

SERVICE PROCEDURE
1. Drain and remove the transmission oil pan.
• Refer to the AT section in the appropriate Service Manual (ESM) for oil pan removal instructions.
2. Locate the ground terminal for the line pressure solenoid.
3. Remove the bolt and small bracket holding the ground terminal.
IMPORTANT: Make sure the metal washer that sits on the rubber grommet doesn’t fall off.
4. Make sure the ground terminal will not pull completely off of the wire.
• Use moderate force to pull / push the wire in and out of the terminal (no more than 5 lbs of pull force).
a. If the terminal pulls completely off the wire with 5 lbs of pull force, replace the solenoid valve assembly (see Parts Information).
• Refer to the AT section of the appropriate Service Manual (ESM) for solenoid replacement.
• Skip to step 11.
b. If the terminal does not pull completely off of the wire, go to step 5 and continue with this procedure.

Get the file Download here

2007 Nissan Versa Owner Guide

http://3.bp.blogspot.com/_lsyt_wQ2awY/SLG5AftWyPI/AAAAAAAAV0Y/mEilD3E7yuA/s400/Nissan-Versa_Sedan_2007_800x600_wallpaper_01.jpg

Short Description
This manual includes information for all options available on this model. Therefore, you may find some information that does not apply to your vehicle. All information, specifications and illustrations in this manual are those in effect at the time of printing. NISSAN reserves the right to change specifications or design without notice and without obligation.

Website: www.nissanversa.org | Filesize: 4698kb
No of Page(s): 280

Content

The head restraint moves forward utilizing the force that the seatback receives from the occupant in a rear-end collision. The movement of the head restraint helps support the occupant?s head by reducing its backward movement and helping absorb some of the forces that may lead to whiplash type injuries. Active head restraints are effective for collisions at low to medium speeds in which it is said that whiplash injury occurs most. Active head restraints operate only in certain rear-end collisions. After the collision, the head restraints return to their original positions. Properly adjust the active head restraints as described in this section.

If you are wearing your seat belt properly adjusted and you are sitting upright and well back in your seat with both feet on the floor, your chances of being injured or killed in an accident and/or the severity of injury may be greatly reduced. NISSAN strongly encourages you and all of your passengers to buckle up every time you drive, even if your seating position includes a supplemental air bag.

Get the file Download here

2003 Nissan Xterra Maintenance Manual

https://blogger.googleusercontent.com/img/b/R29vZ2xl/AVvXsEimFKQ7HRrRDryIjRe_QjjRBETuYeTCGN15KzWuLwNA8urneBFqaMg3pkV-YoTr4eQxD0oU3QbgiJtrX_asiSURRTvNGYSEgGcCPKz0QZduTJGDlvuiRKnuQZu0xyaU4OGCvv4Mjd4eNi_o/s400/2002+Nissan+Xterra.jpg

Short Description
This vehicle will handle and maneuver differently from an ordinary passenger car because it has a higher center of gravity for off-road use. As with other vehicles with features of this type, failure to operate this vehicle correctly may result in loss of control or an accident. Be sure to read “On-pavement and offroad driving precautions”, and “Avoiding collision and rollover”, and “Driving safety precautions”, in the “Starting and driving” section of this manual.

Website: xterrafirma.com | Filesize: 3969kb
No of Page(s): 272

Content

- Never allow anyone to ride in the cargo area or on the rear seat when it is in the fold-down position. Use of these areas by passengers without proper restraints could result in serious injury in an accident or sudden stop.
- It is extremely dangerous to ride in a cargo area inside a vehicle. In a collision, people riding in these areas are more likely to be seriously injured or killed.
- Do not allow people to ride in any area of your vehicle that is not equipped with seats and seat belts. Be sure everyone in your vehicle is in a seat and using a seat belt properly. Never ride in the rear seat unless the seat bottom cushions are in place and latched.
- Properly secure all cargo with ropes or straps to help prevent it from sliding or shifting. In a sudden stop or collision, unsecured cargo could cause personal injury.
- When returning the seatbacks to the upright position, be certain they are completely secured in the latched position. If they are not completely secured in the latched position, passengers may be injured in an accident or sudden stop.

Supplemental front air bag system
The driver supplemental front air bag is located in the center of the steering wheel. The passenger supplemental front air bag is mounted in the dashboard above the glove box. These systems are designed to meet optional certification requirements under U.S. regulations. They are also permitted in Canada. The optional certification allows the front air bags to be designed to inflate somewhat less forcefully than previously. However, all of the information, cautions and warnings in this manual still apply and must be followed. The supplemental front air bag system is designed to inflate in higher severity frontal collisions, although it may inflate if the forces in another type of collision are similar to those of a higher severity frontal impact. It may not inflate in certain frontal collisions. Vehicle damage (or lack of it) is not always an indication of proper supplemental front air bag system operation.

Get the file Download here

2006 Nissan Service and Maintenance Guide

[Nissan-370Z-Senna-Tuning-8.JPG]

Short Description
Preventative scheduled maintenance is an important investment to optimize the performance, reliability, safety and resale value of your Nissan. Scheduling your vehicle’s maintenance at the recommended intervals will ensure your vehicle is running at its best. We want you to enjoy your Nissan vehicle. This Service and Maintenance Guide is designed to help you make sure your vehicle receives proper and timely maintenance that is necessary. Key services are explained in detail, along with an outline of scheduled maintenance to help you maintain your vehicle. Your local Nissan dealer can assist you in determining the best schedule based on your driving habits and local conditions.

Website: www.nissanusa.com | Filesize: 1304kb
No of Page(s): 59

Content

In-Cabin Microfilter
The In-Cabin Microfilter filters the air you breathe in your vehicle. This system filters both outside and recirculated air used by the air conditioning system in your vehicle. Replacing the Microfilter every year or 15,000 miles is the best way to help prevent road dust, pollen and other air pollutants from entering the interior of your vehicle and the air you breathe. If your vehicle is not equipped with an In-Cabin Microfilter system – see your Nissan dealer about getting one installed – you’ll breathe easier.

Batteries
If your vehicle is slow to start or will not start, please see your Nissan dealer about a Genuine Nissan Replacement Battery. Genuine Nissan Replacement Batteries are designed to meet your vehicle’s original specifications and feature an 84 Month Limited Warranty with 24 Month Free Replacement, regardless of mileage. Plus your Nissan dealer has the knowledge and equipment to test your battery before it fails, so you can travel in confidence.

Get the file Download here

2002 Nissan Xterra Maintenance Manual PDF

https://blogger.googleusercontent.com/img/b/R29vZ2xl/AVvXsEh6_vu8BB4tt6eQVkBHw5D946LkLPzqzNJdq_BX7QEiYmeJ2LP6QVvlyXImhmqLTCwov8tmdwIN8hBnOmzYxbK2IAff-OYGJWmYXclccQ3o7eYjskYnwtFmQiXwx73b6i_s7oaf0MeLPOke/s320/nissan_xterra_s4x2_2008_exterior_angularfront_640x480.jpg

Short Description
Welcome to the growing family of new NISSAN owners. This vehicle has been delivered to you with confidence. It was produced using the latest techniques and strict quality control. This manual was prepared to help you understand the operation and maintenance of your vehicle so that you may enjoy many miles (kilometers) of driving pleasure. Please read through this manual before operating your vehicle.

Website: www.nissanextendedwarranty.com | Filesize: 2274kb
No of Page(s): 263

Content

CHANGING A FLAT TIRE
If you have a flat tire, follow the instructions below:
Stopping the vehicle
1. Safely move the vehicle off the road and away from traffic.
2. Turn on the hazard warning flashers.
3. Park on a level surface and apply the parking brake. Shift the manual transmission into R (Reverse), or the automatic transmission into P (Park).
4. Turn off the engine.
5. Raise the hood to warn other traffic and to signal professional road assistance personnel that you require assistance.
6. Have all passengers get out of the vehicle and stand in a safe place away from traffic and clear of the vehicle.

Get the file Download here

2003 Pontiac Vibe Owners Manual PDF

https://blogger.googleusercontent.com/img/b/R29vZ2xl/AVvXsEin7Gv_rHjz4vZaySACa0wi6Qc-G-VYlT7t1V70DxiRtPuhjQ1vdicNmEs_xDp9M27F1PpvqgWZJ4uzMxPRfRmQ_oDItNuhdY98reE2n1gYjNrFmoqnpaAr7p62B_4W23tPAnqO_ad7uVM6/s320/2003+Pontiac+Vibe+(4).JPG

Short Description
Many people read their owner’s manual from beginning to end when they first receive their new vehicle. If you do this, it will help you learn about the features and controls for your vehicle. In this manual, you’ll find that pictures and words work together to explain things quickly.

Website: www.americauto.ru | Filesize: 3104kb
No of Page(s): 381

Content

When should an air bag inflate?
The driver’s and right front passenger’s frontal air bags are designed to inflate in moderate to severe frontal or near-frontal crashes. But they are designed to inflate only if the impact speed is above the system’s designed “threshold level.” In addition, your vehicle has “dual stage” frontal air bags, which adjust the amount of restraint according to crash severity. For moderate frontal impacts, these air bags inflate at a level less than full deployment. For more severe frontal impacts, full deployment occurs. The driver’s and right front passenger’s frontal air bags are not designed to inflate in rollovers, rear impacts, or in many side impacts because inflation would not help the occupant. The side impact air bags are designed to inflate in moderate to severe side crashes. A side impact air bag will inflate if the crash severity is above the system’s designed “threshold level.” The threshold level can vary with specific vehicle design. Side impact air bags are not designed to inflate in frontal or near-frontal impacts, rollovers or rear impacts, because inflation would not help the occupant. A side impact air bag will only deploy on the side of the vehicle that is struck.

Get the file Download here

Peugeot 307 XSE Touring, Service manual, highlight

https://blogger.googleusercontent.com/img/b/R29vZ2xl/AVvXsEiOE0cAnVGHETLNBnpOm_1ixuQp6N0ZxYZo2oFFOwsMcTb-igEDEhYsf0vY1wlKSdi1QcFZ9LEj9v6H2SqSbdza7jCRT3edgj2pPQLBo0lxiZFylbXt6uQgURz_tzF5j7I53A4xX16nHsE/s400/17.jpg

Short Description
Peugeot’s 307 Touring wagon adds another model choice to the French manufacturer’s popular range. It is aimed squarely at those with active lifestyles who want space, style and performance but who don’t need a large family wagon. Stretching the hatchback’s wheelbase 10cm and adding another 22cm to the overall length gives increased passenger space, load capacity and improved dynamics.

Website: www.aaa.asn.au | Filesize: 48kb
No of Page(s): 1

Content

Engine noise intrudes into the normally quiet cabin on the freeway suggesting a slightly short 5th gear. Some of the longer hills on our road test route highlighted the car’s lack of torque, not that it struggled, there just wasn’t much left in reserve. Away from the freeway and onto some back roads any shortcomings in the engine department are compensated for by the supple suspension. Across patchy and undulating tarmac the ride quality and handling are very good, the car tracking straight, maintaining its line through rough corners. While the steering isn’t sports car direct it has good feel and weight, the nose turning into corners decisively. Mild understeer is the main handling characteristic, the tyres offering good levels of grip, while the brakes are strong and fade free, although the pedal doesn’t offer much feel.

Get the file Download here

Peugeot 107 Specification

http://213.215.107.236/magaziny/images/aktuality/stories/NAJNOVSIE_FOTKY/AUTO-MOTO/peugeot/peugeot_308_gti_promo8_carscoop_blogspot_com.jpg

Short Description
When you choose a Peugeot, you’re buying more than an elegant piece of design or a superb piece of engineering, you’re buying a vision – our dream of a marque that embodies your desires and meets your expectations in every way. A vehicle that is the very personification of the Peugeot spirit. This spirit, or essence, of our marque can be summed up in four words. Style, quality, dynamism and innovation – the values that every Peugeot is created around.

Website: members.upc.nl | Filesize: 2498kb
No of Page(s): 15

Content

So what does that mean to you? It means beauty, stunning design, pure Peugeot lines, the very quintessence of aesthetics as seen by top Peugeot designers. Or roughly translated, a car that makes your heart beat faster every time you look at it. It means a car that you can trust. Every new Peugeot is built to the very highest standards, ensuring technical excellence, superb handling plus peace of mind, and is engineered to achieve optimum active and passive safety. It also means passion. Our passion for creating cars with real poise and precision, cars that communicate with the road and connect with you, lifting your spirits on every journey. Cars that reawaken your enthusiasm for driving. And it goes without saying that it means intelligence. Innovative designs and features that answer your demands for better, safer, more comfortable and environmentally respectful vehicles (we’ve reduced emissions from our engines and every new car we build is 90% recyclable). These are the strands of Peugeot DNA that you’ll find running through every vehicle that bears our name today, and every car that we’ll build tomorrow – just as the four lines run through the pages of this brochure. Creating the perfect chemistry between you and your car. And ensuring you the drive of your life.

Get the file Download here

2002 Pontiac Firebird Owners Manual

http://images04.olx.com/ui/2/98/87/f_17429187_1.jpeg

Short Description
This manual includes the latest information at the time it was printed. We reserve the right to make changes after that time without further notice. For vehicles first sold in Canada, substitute the name “General Motors of Canada Limited” for Pontiac Division whenever it appears in this manual. Please keep this manual in your vehicle, so it will be there if you ever need it when you’re on the road. If you sell the vehicle, please leave this manual in it so the new owner can use it.

Website: www.camarohighway.com | Filesize: 2614kb
No of Page(s): 359

Content

Steering Tips
Driving on Curves
It’s important to take curves at a reasonable speed. A lot of the “driver lost control” accidents mentioned on the news happen on curves. Here’s why: Experienced driver or beginner, each of us is subject to the same laws of physics when driving on curves. The traction of the tires against the road surface makes it possible for the vehicle to change its path when you turn the front wheels. If there’s no traction, inertia will keep the vehicle going in the same direction. If you’ve ever tried to steer a vehicle on wet ice, you’ll understand this. The traction you can get in a curve depends on the condition of your tires and the road surface, the angle at which the curve is banked, and your speed. While you’re in a curve, speed is the one factor you can control.

Steering in Emergencies
There are times when steering can be more effective than braking. For example, you come over a hill and find a truck stopped in your lane, or a car suddenly pulls out from nowhere, or a child darts out from between parked cars and stops right in front of you. You can avoid these problems by braking — if you can stop in time. But sometimes you can’t; there isn’t room. That’s the time for evasive action — steering around the problem. Your vehicle can perform very well in emergencies like these. First apply your brakes. See “Braking in Emergencies” earlier in this section. It is better to remove as much speed as you can from a possible collision. Then steer around the problem, to the left or right depending on the space available.

Get the file Download here

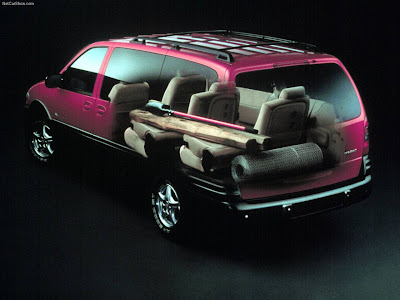
1999 Pontiac Montana Owner Manual

http://lh5.ggpht.com/_LXgkZ-yKhEs/TAp6_UThvOI/AAAAAAAABsY/ebIiEqUiA0w/minivan-GL8.jpg

Short Description
This manual includes the latest information at the time it was printed. We reserve the right to make changes in the product after that time without further notice. For vehicles first sold in Canada, substitute the name “General Motors of Canada Limited” for Pontiac Division whenever it appears in this manual. Please keep this manual in your vehicle, so it will be there if you ever need it when you’re on the road. If you sell the vehicle, please leave this manual in it so the new owner can use it.

Website: www.extendedgmwarranty.com | Filesize: 3152kb
No of Page(s): 440

Content

Buying New Tires
To find out what kind and size of tires you need, look at the Certification/Tire label. The tires installed on your vehicle when it was new had a Tire Performance Criteria Specification (TPC Spec) number on each tire’s sidewall. When you get new tires, get ones with that same TPC Spec number. That way your vehicle will continue to have tires that are designed to give proper endurance, handling, speed rating, traction, ride and other things during normal service on your vehicle. If your tires have an all-season tread design, the TPC number will be followed by an “MS” (for mud and snow). If you ever replace your tires with those not having a TPC Spec number, make sure they are the same size, load range, speed rating and construction type (bias, bias-belted or radial) as your original tires.

Uniform Tire Quality Grading
The following information relates to the system developed by the United States National Highway Traffic Safety Administration, which grades tires by treadwear, traction and temperature performance. (This applies only to vehicles sold in the United States.) The grades are molded on the sidewalls of most passenger car tires. The Uniform Tire Quality Grading system does not apply to deep tread, winter-type snow tires, space-saver or temporary use spare tires, tires with nominal rim diameters of 10 to 12 inches (25 to 30 cm), or to some limited-production tires. While the tires available on General Motors passenger cars and light trucks may vary with respect to these grades, they must also conform to Federal safety requirements and additional General Motors Tire Performance Criteria (TPC) standards.

Get the file Download here

PERFORMER RPM ALUMINUM CYLINDER HEADS for 1965-79 Pontiac V8s

http://www.automopedia.org/wp-content/uploads/2008/03/2009-pontiac-g8-gxp-500px.jpg

Short Description
Designed for 1965-1979 389-455 c.i.d. Pontiac engines, these heads are patterned after the 1969-1970 Ram Air IV Pontiac cylinder head. Two styles are available: 87cc combustion chamber version for applications requiring an 87cc combustion chamber and a 72cc chamber version for applications requiring a 72cc combustion chamber. Both heads have Ram Air IV port flanges. Performer RPM Pontiac heads produce outstanding horsepower with excellent low speed torque and throttle response. High flow exhaust ports require Ram Air IV headers or exhaust manifolds. On both versions, the deck surface is 5/8″ thick for superior durability and head gasket retention. All factory accessory bosses are included for bolt-on convenience. Performer heads #60569 and #60579 have the exhaust heat cross-over machined and are street legal on 1965-1979 vehicles with 389-455 c.i.d. V8s without secondary air injection. Note: In 1967-1968 Pontiac, change valve angle from 17° to 14°. Edelbrock Pontiac cylinder heads use the later 14° valve angle. When installing Edelbrock Pontiac cylinder heads on 1965-1966 and some 1967 engines that came stock with the early 17° valve angle, compatibility of valves with pistons will need to be checked.

Website: www.edelbrock.com | Filesize: 26kb
No of Page(s): 2

Content

PONTIAC CYLINDER HEAD INTAKE MANIFOLD
GASKET FITTING:
NOTE 1: The position of the intake port entry on all Edelbrock Pontiac cylinder heads has the same roof height as a Pontiac 455 Super Duty cylinder head. This was done to provide the best performing intake port while maintaining a stock Pontiac port location. The Fel-Pro 1233 intake manifold gasket has a port roof to intake manifold bolt hole centerline dimension that is .06″ lower than 455 Super Duty head dimension. When installing the Fel-Pro 1233 intake gasket on Edelbrock Pontiac cylinder heads, align the gasket with the intake port entries. Three of the bolt holes in the gasket will have to be elongated as shown in the illustration. NOTE 2: The radii of the intake port entry corners on Edelbrock Pontiac cylinder heads is 3/16″ to maximize the cross-sectional area through smallest part of the port. The corners of the intake port openings of a Fel-Pro 1233 intake manifold gasket are 3/8″. If you are using the intake manifold without port-matching the runner exits or if you port match to the 3/8″ radius, you do not have to modify the corners of the port openings in the gasket. If you are port-matching to the 3/16″ radii in the cylinder head, then the corners of the gasket port opening should be modified.

Get the file Download here

1999 Pontiac Montana Owner Manual PDF

https://blogger.googleusercontent.com/img/b/R29vZ2xl/AVvXsEg7jo4QtEQ1W7kupQapIdLypW7h1mA9LZDEpAQ7cVhI9LGAwjdkWjVZKxJDiORwVuaRqUMY601UdWBSK0NtdBRgr57WmJIDsha4KtYA_sNrV1J_4lUhap84l8cjvF2H0fLBPVTJMttYFaNL/s400/Pontiac-Montana_2001_1280x960_wallpaper_09.jpg

Short Description
How to Use this Manual
Many people read their owner’s manual from beginning to end when they first receive their new vehicle. If you do this, it will help you learn about the features and controls for your vehicle. In this manual, you’ll find that pictures and words work together to explain things quickly.

Website: www.mygmlink.com | Filesize: 3152kb
No of Page(s): 440

Content
Seats and Seat Controls
This section tells you about the seats — how to adjust them, take them out, put them back in and fold and unfold them.
Driver’s 4-Way Manual Seat
Use the lever on the front left side of the seat to adjust the seat forward or rearward. Pull up the lever on the front of the seat to unlock it. Slide the seat to where you want it. To make sure the seat is locked into place, release the lever and try to move the seat with your body.
To raise the seat, pull up on the lever on the front right side of the seat. To lower the seat, push the lever down.

Second Row Safety Belt Stowage
If your vehicle has seats in the third row, there is a sleeve on the second row outside safety belt to store the safety belt while entering and exiting the third row of the vehicle.

Get the file Download here

2004 Pontiac GTO Owner Manual PDF

http://www.zastavki.com/pictures/1280x1024/2008/Auto_Pontiac_Pontiac_GTO_006651_.jpg

Short Description
GENERAL MOTORS, GM, the GM Emblem, PONTIAC, the PONTIAC Emblem and the name GTO are registered trademarks of General Motors Corporation. This manual includes the latest information at the time it was printed. We reserve the right to make changes after that time without further notice. Please keep this manual in your vehicle, so it will be there if you ever need it when you’re on the road. If you sell the vehicle, please leave this manual in it so the new owner can use it.

Website: www.ls1gto.com | Filesize: 2292kb
No of Page(s): 326

Content

Engine exhaust can kill. It contains the gas carbon monoxide (CO), which you can not see or smell. It can cause unconsciousness and death. You might have exhaust coming in if:
• Your exhaust system sounds strange or different.
• Your vehicle gets rusty underneath.
• Your vehicle was damaged in a collision.
• Your vehicle was damaged when driving over high points on the road or over road debris.
• Repairs were not done correctly.
• Your vehicle or exhaust system had been modified improperly. If you ever suspect exhaust is coming into your vehicle:
• Drive it only with all the windows down to blow out any CO; and
• Have your vehicle fixed immediately.

Get the file Download here

1989 Porsche 911 Carrera 4 Coupe AWD F6-3600cc 3.6L SOHC

https://blogger.googleusercontent.com/img/b/R29vZ2xl/AVvXsEg4i3vAYqIbgSw5uoLUKGSLmNbY-0flVu3AiMy-Ie6IrWDU-RsZbZ0wA0FCH2DSIqQqwVgD0robXDXW6zqVtCA69DwCQuorKrWQgUF0PF2SS9xh3c0qJ__UpCUARp3oAVMdxGXCcMTOrFc/s1600/carrer.jpg

Short Description
Oil leakage between cylinder and cylinder head. Oil “leakage” in the case of 911 Carrera 2/4 engines means oil leaking (drops forming) from the cylinder to cylinder head mating area, resulting in oil wetness on the lower area of the cylinder head or on the exhaust heat exchangers. Due to higher operational temperatures of the Carrera 2/4 engines, some blackening (carbonizing) of oil at the lower sealing area is possible. If there is only a small discolored area on the bottom of the cylinder head without wetness, this can be considered normal and no repairs are necessary.

Website: efinnegan.com | Filesize: 87kb
No of Page(s): 5

Content

When repairing oil leaks from the cylinder to cylinder head sealing area on engines prior to the above engine numbers, all cylinders and pistons should be replaced and all cylinder head sealing surfaces refaced. Cylinder head nuts are reusable.
IMPORTANT: Replacement piston and cylinder sets have a groove to accommodate a seal between the cylinder head and cylinder mating surface (Figure 1). Effective immediately, only the steel sealing ring, Part Number 964 104 115 20 is to be used during repairs. This information also applies to engines produced after the above mentioned engine numbers. When installing the cylinder head to the cylinder, the steel sealing ring must be fully installed in the groove of the cylinder. Sparingly use light grease to hold the ring in the cylinder during installation. The above subject repair will require PRIOR District Service Manager authorization until further notice (this includes dealers on the self-authorization program). All subsequent repairs needing to be done, in addition to the cylinder head re-machining, piston and cylinder replacement, exceeding $100 will also require a PRIOR District Service Manager authorization.

Get the file Download here