Short Description
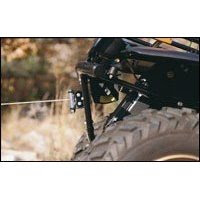
When using the winch to raise and lower a blade a cable stop must be installed. Carefully raise the blade until the top of the push tube’s are no closer than 1” anywhere on the ATV. Place the Cable Stop onto the Winch Cable up against the Winch Hawse. Secure the Cable Stop to the Winch Cable using the Cable Clamp Assembly as shown in the pictures below.
Website: www.masterlockatvwinch.com | Filesize: 904kb
No of Page(s): 6
Content
…
1. Remove the rubber bumper guard and the wire screen from the front bumper.
2. Center the Winch Mount Strap between the two vertical bumper channels. Loosely attach the Winch Mounting Strap to the lower bumper cross tube, located just behind the front brush guard, using the 5/16” x 1” x 1-3/4” U-Bolt. SEE DIAGRAM BELOW.
3. Center the Winch Mount Plate between the two vertical bumper channels and behind the front bumper tube. Orient the Winch Mount Plate so there is one U-Bolt hole on each side of the bumper tube. Loosely secure the Winch Mount Plate to the ATV tube using the two 5/16” x 1” x 1-3/4” U-Bolts. SEE DIAGRAM BELOW.
4. Slide the Winch Mount Strap up underneath the Winch Mount Plate so the round hole of the Winch Mount Strap is behind the Winch Mount Plate. Secure the Winch Mount Strap and Winch Mount Plate together with the 5/16” x 3/4” Carriage Bolt. TIGHTEN ALL BOLTS FULLY. SEE DIAGRAM BELOW.
…
Get the file Download here